Setting up a Simple Automated Front-end Dev Workflow
Front-end development is very interesting. You can really see what’s happening when you type in your code. And dealing with HTML, CSS, and JS to build a good-looking user interface is much easier and more rewarding than a very platform-targeted UI building process.
As a backend developer, the first front-end things that I encountered are plain HTML and jQuery. I solely used them to manipulate DOM, and sometimes passed request parameters to the backend services using the AJAX functions provided by jQuery. I still can clearly remember when I wrote my first CSS rule and first time experience with bootstrap, I was totally amazed at the interface. You can build really appealing eye-candy with just a few simple CSS rules and predefined classes. The feeling just like when you meet a girl of your type when you’ve hanging out only with guys for months. At that moment, I know that I’ve felt in love with it.
Like being around with a girlfriend, there are indeed some downtime. When writing front-end code. The thing that I hate most is that you always have to click the refresh button when you modify any HTML, CSS, or JS file. And after some time, I was done with it. With my hurting finger, I decided to search a for better tool. Then I came to this: Gulp.
Gulp is an automated build system that you can exploit to build your own front-end development workflow. A variety of plugins are ready to be configured that can be easily integrated into Gulp to streamline your development process. It depends on Node.js. So you have to install it on your machine.
One plugin that is quite useful when you are tired of clicking the refresh button constantly during your frond-end learning and development adventure. It is browser-sync. With browser-sync, you can configure a gulp task that can automatically fired up a web server and watch any change made to the files you specify. Most of the time, the files we want it to watch is our HTML, CSS, and JS source files. Here we use a very general directory structure to explain how to use these tools to make life a lot easier.
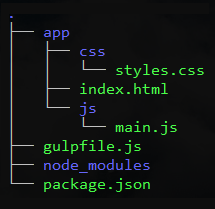
As you can see in the above image, our HTML files are located in the app/ directory. CSS and JS files are located in css/ and js/ directory in app/. In the parent directory of app/, we can find Gulp configuration file gulpfile.js and node_modules which contains all the plugins you installed locally. All the Node.js modules as plugins are specified in package.json. The following two blocks of code are the content of gulpfile.js and package.json.
To set up the working environment, first Node.js has to be installed. Once, this is done, the Node.js package manager npm will be right at our service. npm is used to install Node.js modules/packages whose concept is very similar to yum, apt in the linux world or homebrew on OS X or Chocolatey on Windows.
After all the files and directories are created and with gulpfile.js and package.json correctly configured just like two block of code shown above, open a command line window (cmd on Windows), cd to the directory where package.json is located, type in npm install. This command tells npm to install all the packages specified in the package.json into the current local directory. When the installation process is completed, type in gulp and hit enter. Your default browser will be automatically fired up right away. From this moment on, when you save a change to any of the HTML, JS, CSS files, the browser will automatically reload modified files. Here it is a little bit different for CSS. The newly modified CSS is injected into the loaded page. No refresh is need to make the effect seen on change. Cool!
This is just a simple demonstrative use of Gulp. However, one can use it as a starting point to build more complex workflow, such as compilation of CSS code from SASS or LESS source code, concatenation and compression JS and CSS files. All these tasks can be chained together into a single pipeline. If you are interested, search the web to learn more! Have fun!
